🛒WooCommerce
Overview
Moneroo is a versatile payment orchestration platform designed to streamline online transactions by providing a single integration point for multiple payment providers. The Moneroo WooCommerce plugin brings this flexibility and convenience to your WordPress eCommerce store, enabling you to accept a variety of payment methods with ease. This guide walks you through the steps to install and configure the Moneroo plugin for your WooCommerce store.
Prerequisites
A WordPress website with WooCommerce installed and activated
Admin access to the WordPress dashboard
Moneroo Plugin ZIP file or access via the WordPress Plugin Repository
Installation Steps
Installing via WordPress Plugin Repository
Watch this video to learn how to install the Moneroo plugin for WooCommerce via the WordPress Plugin Repository
Log in to WordPress Dashboard: Navigate to your WordPress Admin Dashboard.
Navigate to Plugins: Click on Plugins > Add New.
Search for Moneroo: Use the search bar to find "Moneroo".
Install and Activate: Click Install Now next to Moneroo, and then click Activate.
Configuration
Watch this video to learn how to configure the Moneroo plugin for WooCommerce.
Enable Moneroo
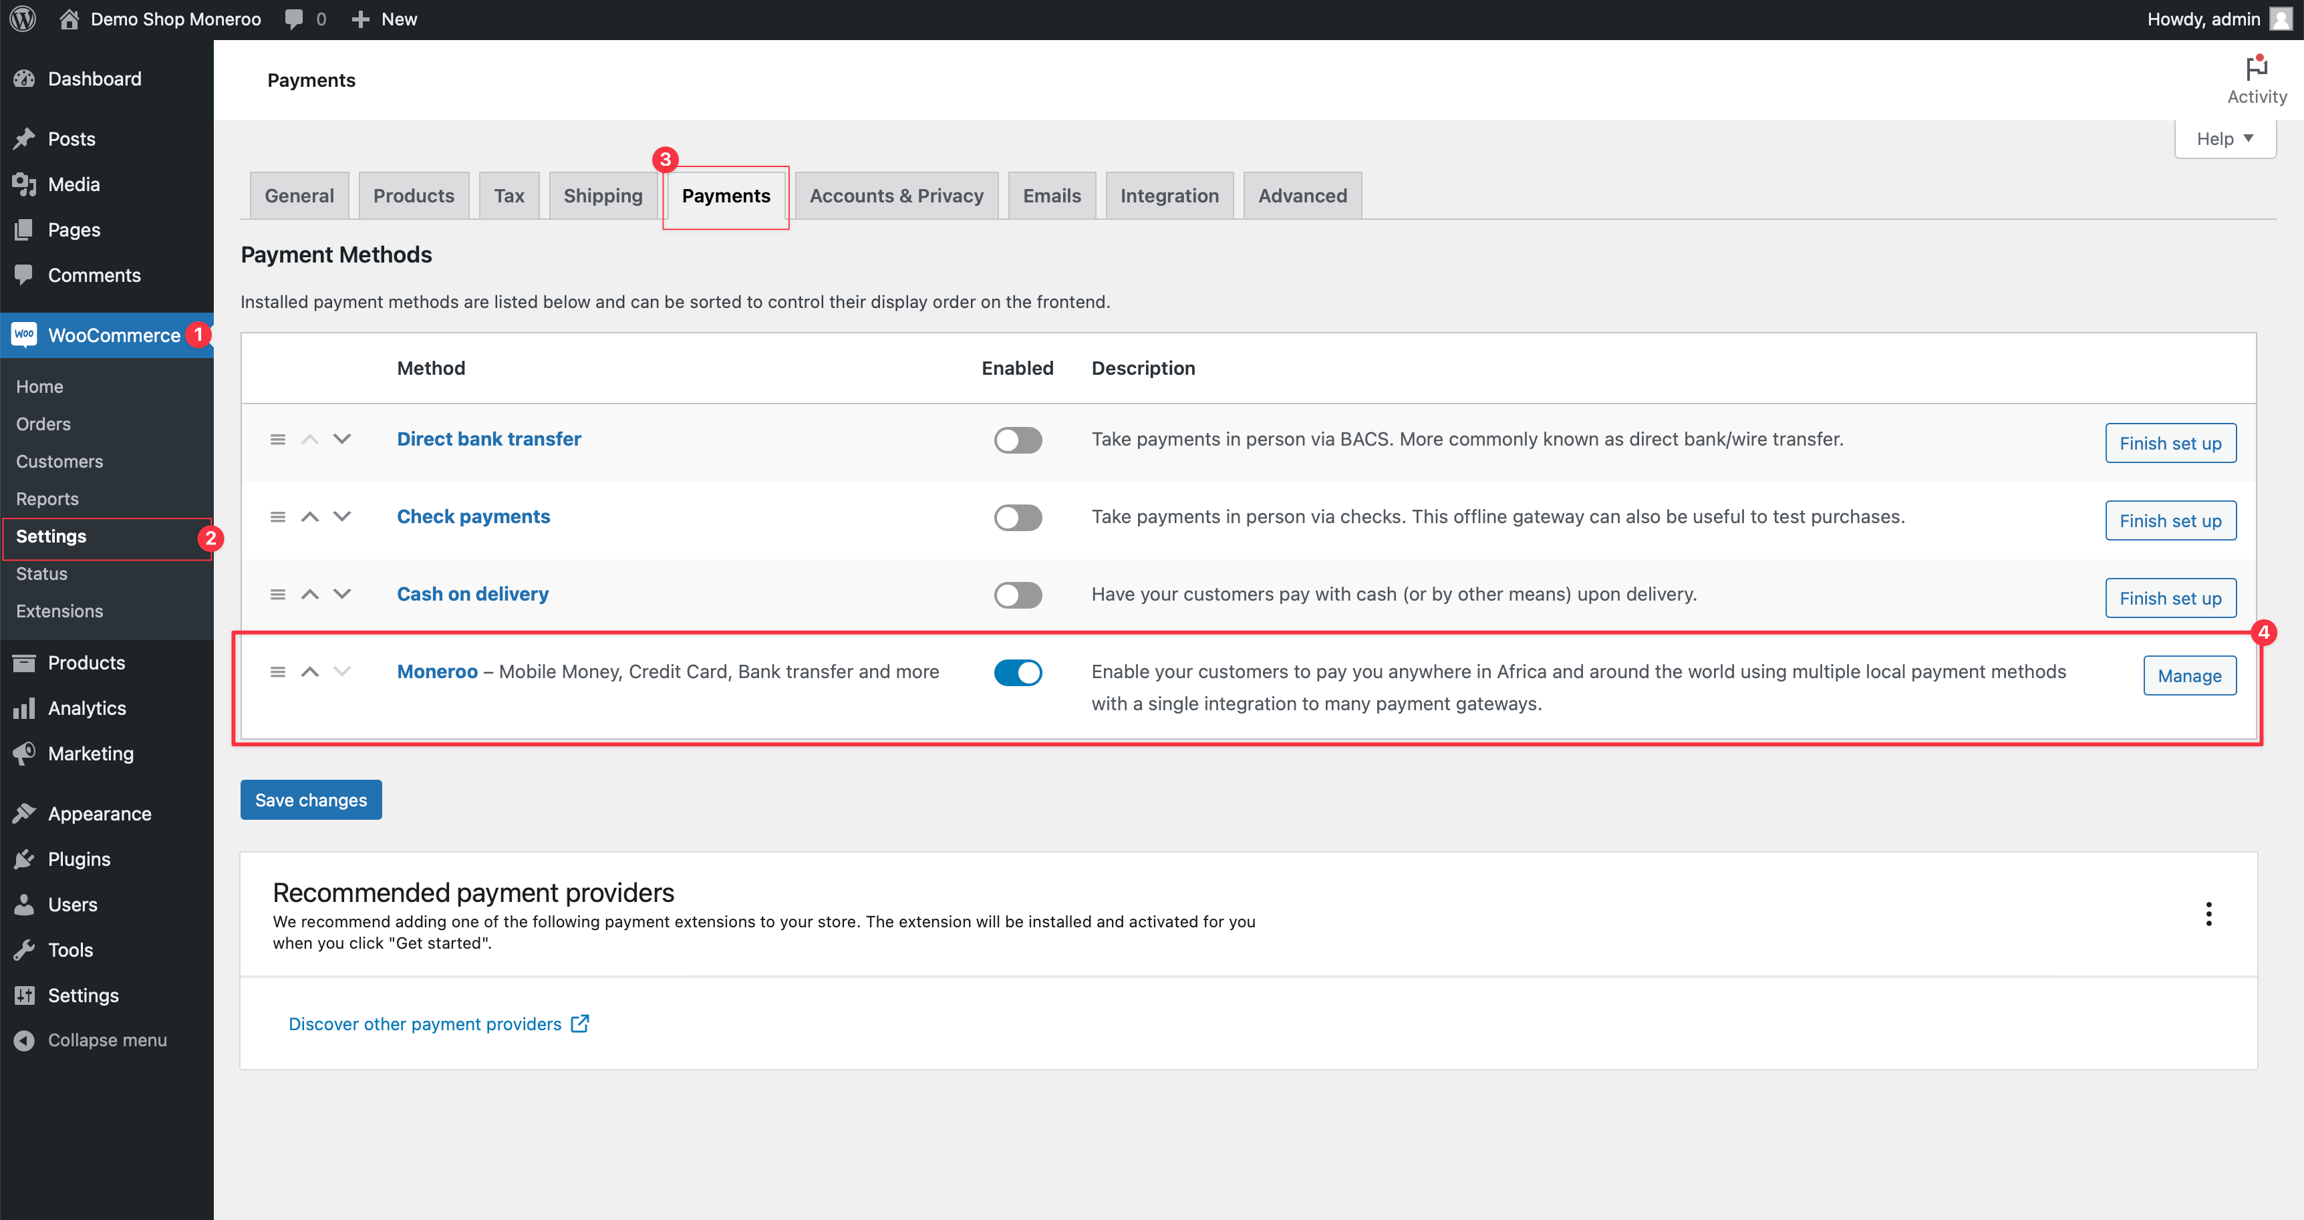
Navigate to WooCommerce > Settings
Click on the Payments tab.

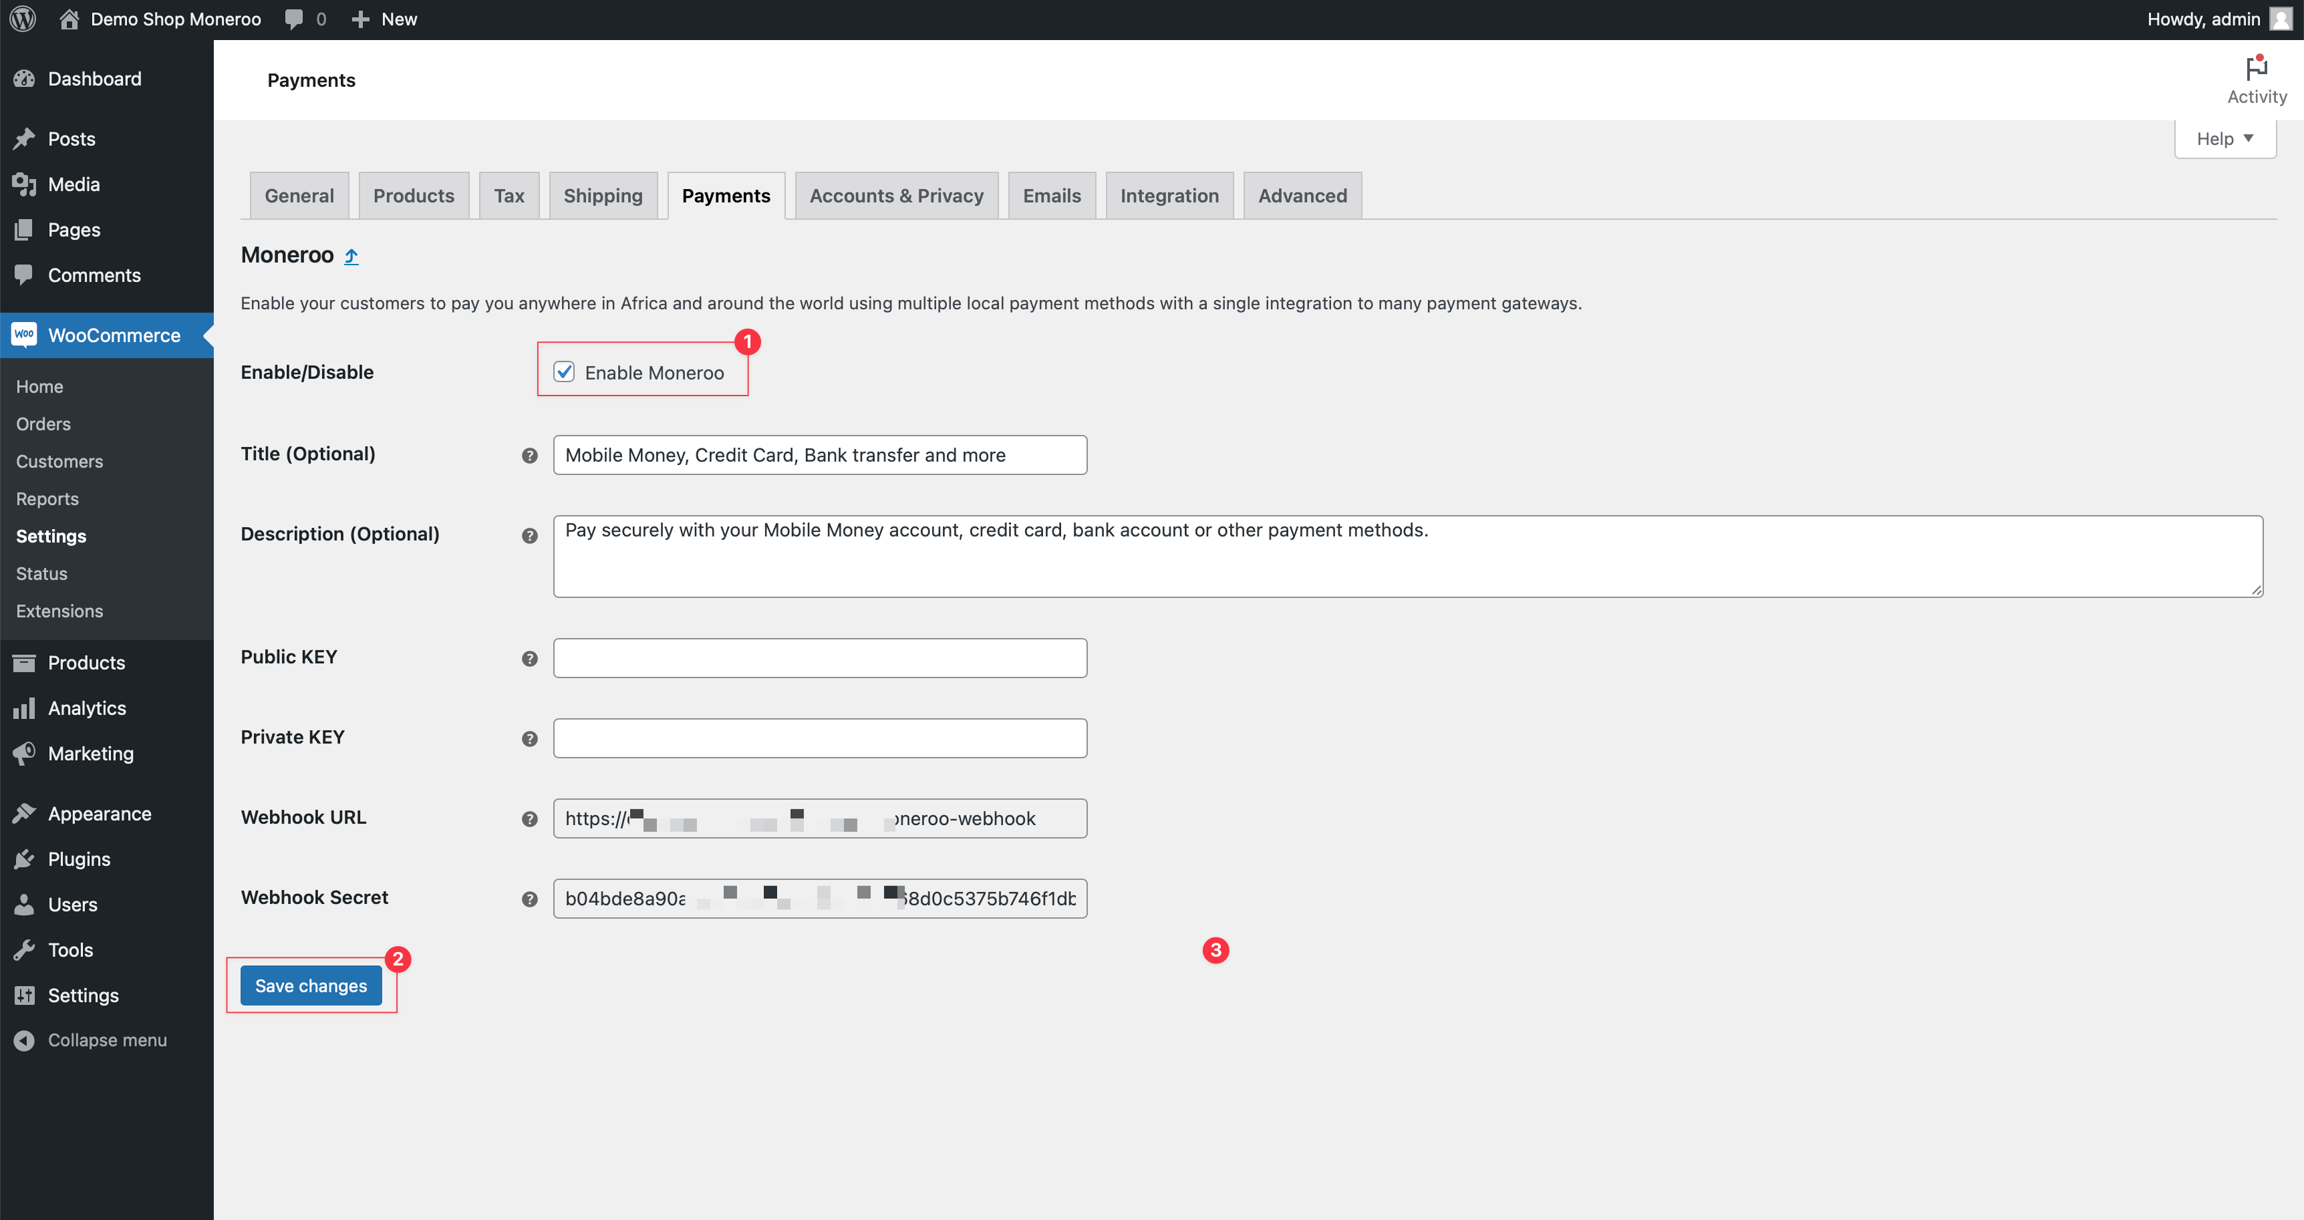
Find "Moneroo" and click Manage or Set Up. Enable by checking the "Enable Moneroo" box and click "Save changes".

Setup API Credentials
Go to Moneroo Dashboard > Developers > API Keys section and create a new API key.
Create a "Secret key", and input them into the corresponding fields.
You can name the API key anything you like (e.g. "My WooCommerce Store Secret Key").
Setup Webhook
Moneroo uses webhooks to notify your store when a payment is successful or fails. This is very useful for updating the order status in your store when customers are not redirected to your store after payment, as is the case with some payment methods.
In Moneroo settings pages in your store, we already provide a webhook URL and a secret key for you to use.
Copy the webhook URL and webhook secret key, and go to Moneroo Dashboard > Developers > Webhooks section.
Click on Add webhook and fill in the form with the following details:
URL: The URL of the webhook.
Secret: The secret key used to sign the webhook payload.
Save configurations
Click on Save Changes to save the configurations.
Test Payment
Test the payment by placing an order on your store and completing the payment. Done! You have successfully installed and configured the Moneroo plugin for your WooCommerce store.
Others settings
Moneroo plugin for WooCommerce has some other settings that you can configure to suit your needs.
Title: The title of the payment method displayed to customers during checkout.
Description: The description of the payment method displayed to customers during checkout.
The Title and Description fields are optional. If you leave them blank, the default values will be used.
Do not forget to click Save Changes after making any changes to the settings.
Support
If you have any questions or need help, feel free to contact us. We are always happy to help you with any questions you may have.
Last updated
Was this helpful?